
How to Make a Reaction Video: Complete Guide


How many times have you sent a funny reaction video to your friend to make them laugh? Or shared a nostalgic one in the family group chat? Reaction videos are one of the easiest ways to engage and build your audience, and they’re shareable enough to make you go viral.
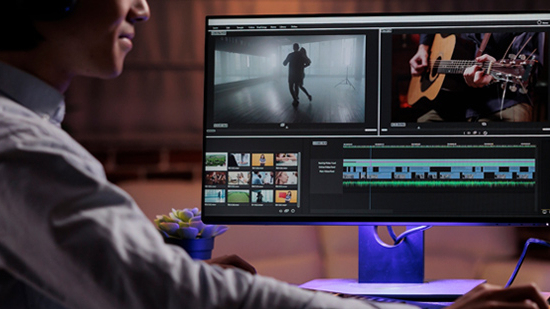
Stitching together your video with the original post sounds complicated at first, but you don’t need pro editing skills or fancy equipment for it. In this guide, we show you how to make reaction videos with PowerDirector 365, its Screen Recorder, and its other AI-powered editing tools.
- What Is a Reaction Videoy
- Why Are Reaction Videos So Popular
- How to Make a Reaction Video: Step-by-Step Guide
- Step 1: Choose the Right Content
- Step 2: Set Up Your Screen Recorder
- Step 3: Nail Your Reaction
- Step 4: Edit Your Video Like a Pro
- Step 5: Export and Upload to YouTube
- Start Creating Your Own Reaction Videos Today
- FAQs About Making Reaction VideosMarket your products
What Is a Reaction Video?
Reaction videos show a person’s reaction as they watch an original piece of content online. In a reaction video, the poster stitches their reaction with the original content, so the audience can experience the moment with them. There are many types of videos people react to, such as:
- Movie trailers and clips
- Music videos
- Video game highlights
- Viral videos
- TikToks, YouTube shorts, and memes
- TV show moments
Reaction videos make viewers feel like they’re experiencing content with another person. It makes them feel like they have something in common with the poster, even if it’s just a shared moment of laughter, surprise, or nostalgia. Some content creators even add context and helpful information, like offering tips for how viewers can handle or avoid similar situations.
Why Are Reaction Videos So Popular?
Even one reaction video can bring thousands of new viewers to your account. They’re a low-effort way to educate people, build community, and collaborate with popular creators. Here are just a few reasons why so many content creators make reaction videos:
Easy to make:
You can make a reaction video with only a screen recorder and camera. You don’t have to do much editing to stitch the videos together, and some video editors let you record your screen and yourself together.
Higher engagement:
People want to see what you think about trending videos. Reaction videos encourage sharing and commenting, so you can reach more viewers.
Account growth:
Some YouTubers and TikTokers build their whole channels around reaction videos. You can gain an audience when you react to trending clips, and people will start to connect your account with viral videos.
Community interaction:
Whether people like your reactions or not, they’ll spark conversation in the comments. People will interact with your videos and with each other, which boosts your account visibility.
Can go viral:
If you can create well-made videos with authentic reactions, you can get thousands or even millions of views. It may not happen with your first one, but over time, you’ll build a social presence and get noticed.
How to Make a Reaction Video: Step-by-Step Guide
Making your first reaction video only takes a few steps with the right equipment and editing tools. Once you set them up, record your reaction, and share your video, you’ve already started growing your audience and your account.
- Choose the Right Content
- Set Up Your Screen Recorder
- Nail Your Reaction
- Edit Your Video Like a Pro
- Export and Upload to YouTube
- Choose the Right Content
- Set Up Your Screen Recorder
- Open PowerDirector 365 and launch the Screen Recorder.
- Select “Full Screen + Webcam” to turn on your webcam and record your reaction while capturing the original video on your screen.
- Your webcam feed will appear as a small overlay window on top of the original video. Before you start recording, position it in the corner of the screen to give a clear view of the video. That will let viewers see what you’re reacting to.
- Adjust and test your audio settings to make sure PowerDirector 365 picks up both the system audio and your voice. You may want to lower the original video’s audio, so viewers can hear your reaction while it’s playing.
- Hit “Record,” play your video, and react!
- Nail Your Reaction
- Edit Your Video Like a Pro
- Trim your video

Shorter videos keep viewers’ attention. If your reaction video has long pauses or parts where nothing happens, cut them with PowerDirector 365’s trimming tool. You can also edit with Text-Based Editing, which lets you cut parts directly from the transcript.
- Adjust the picture-in-picture (PIP) layout

Even though you placed your webcam before you recorded your video, you can adjust other settings during editing, too. Double click on your clip to open the PIP designer to change your camera position, zoom in, and alter your video scale.
- Enhance audio clarity

Use PowerDirector 365’s noise reduction and volume leveling tools to balance your audio. That might mean lowering the volume of the original video, adjusting for loud moments, or getting rid of background noise to keep the focus on your reactions.
- Add captions and text overlays

Captions make your reaction video accessible for deaf and hard of hearing viewers, as well as anyone who has auditory processing difficulties. Text overlays help emphasize big moments in the video, and you can use them to add context.
PowerDirector 365’s Speech to Text feature automatically adds subtitles from your audio when you select it, so you only have to look over the text to make sure it caught everything.
- Use jump cuts and zoom-ins

If you have a mistake in your video and want to replace it, select your clip in PowerDirector 365 where the mistake begins. Then, split it again where you want the video to pick back up. Right click, and choose to cut, fill the gap, and combine your clips to stitch everything back together. In the PIP designer, use the position settings to adjust your scale to zoom in on your face during dramatic reactions.
- Insert effects, transitions, and animations

Under the Effects tab, you can add blur, motion, distortion, and other effects that emphasize your reactions. Use the Transitions section to carry your audience into the next part of your video for any final thoughts. You can also add animations that react with you or give visual context.
- Export and Upload to YouTube

If you want to go viral, you need to choose a video to react to that matters to your audience. Trending content means people are already searching for and sharing videos about it. At the same time, content that strikes an emotional chord, like a marriage proposal, a prank, or a lost pet reuniting with its owner, resonates with audiences, even if it’s not currently trending.
Know what kind of content clicks with the people you want to find you. Think about what entertains them, like music videos, gaming streams, or viral clips, so you build an audience you like interacting with.
Make sure you have permission to use the original video before you start recording. Only use copyrighted content if you’ve asked the owner of the video first. Otherwise, stick to fair use material. That will save you from getting takedown notices or other strikes on your account.

You can record your screen and your reaction video separately, but that involves spending extra time stitching the two videos together. You can make more videos and post more content with PowerDirector 365’s Screen Recorder.
This feature records your device’s screen and uses your webcam to catch your reaction at the same time. With the Screen Recorder, you can skip stitching your videos and go straight to editing and posting. Here’s how to set it up and use it:


Along with having PowerDirector 365 to help you make a great reaction video, use a high-quality microphone. A good mic gives you crisp audio and filters out background noise, so you don’t have to do as much sound editing.

A reaction video doesn’t work quite the same way as reacting with your friends crowded around your phone screen. You want your viewers to engage with you, not just watch you and move on.
People want to see genuine emotion in your video, and they can tell when you’re faking it. Even if you’ve already seen the viral video you’re reacting to, show how you genuinely feel about it while you’re recording.
Your viewers want to hear your thoughts, too. Talk about what you’re thinking as the video plays. Do you think you know what’s going on in it? What do you think will happen next?
What’s your opinion on what’s happening? Tell your audience, and ask them to put their thoughts in the comments!
Your opinion on the original video prompts people to agree, disagree, or offer their own thoughts. Knowing when to say something and when to pause is a strategy in itself, and you’ll learn how to keep that balance as you make more videos.
Now that you have your recording, it’s time to edit and enhance your reaction video. Even though PowerDirector 365 cut out the need for stitching videos, you’ll still need to refine your audio, think about accessibility, and improve the overall video quality.
Don’t worry if this is your first time editing a video. You don’t need professional skills to do it with PowerDirector 365’s AI-powered tools. Download it below and follow the steps to get started:


PowerDirector also has AI-powered tools that automatically remove long pauses, and the AI Video Enhancement feature boosts the quality of your entire video.

You’ve finished editing, and now you’re ready to post! Choose whether you want to export your video from PowerDirector 365 in 1080p or 4K to keep its quality. Then, make it easy to find by giving it a title that makes people want to click. Don’t forget to add keywords and tags, like “reaction video” or “reacting to” with the original video title.
When you add your thumbnail, choose one of your most expressive moments. That will capture interest and make people want to see what caused your reaction. Now, share it on YouTube, TikTok, or Instagram, watch the comments come in, and engage with your viewers!
Start Creating Your Own Reaction Videos Today!
Even if you’ve already nailed your reactions, PowerDirector 365’s Screen Recorder helps you capture them with more clarity and less editing. You can make a pro-level reaction video with its AI-powered tools, even if you’re just starting out on YouTube or TikTok.
Download PowerDirector 365 for free and record your next reaction video now!
FAQs About Making Reaction Videos
1. Can I monetize reaction videos on YouTube?
You can, but make sure you have permission to do it. Using fair use content here will help you avoid copyright issues, but you can also get permission from the original poster. You’re more likely to make money and go viral with your reactions when you have something unique to say or when you react in a way viewers don’t expect.
2. How do I avoid copyright strikes on reaction videos?
Aside from using fair use content, you can avoid strikes by using short video clips, instead of reacting to an entire video. If the original video has music, muting it can avoid copyright issues on your audio. Use your own commentary to add something new to the video and put emphasis on your thoughts and reaction.
3. What’s the best screen recording software for reaction videos?
We recommend PowerDirector 365 and its Screen Recorder for filming reaction videos. It captures your screen and records you with your webcam at the same time, cutting down on hours of editing. PowerDirector 365 also has plenty of other AI-powered tools to make the entire editing process quicker for both beginners and experienced YouTubers.
4. How long should a reaction video be?
The length of your reaction video depends on the content. Sometimes, a 1- or 2-minute video is enough to share your thoughts in an Instagram reel. If you’re posting a longer video to YouTube or TikTok, don’t go more than 5–15 minutes. Videos that go on too long will lose audience attention, even if your reaction is worth watching.
5. What makes a reaction video successful?
Above all, a genuine reaction will get more views and engagement. It also helps to have thoughtful commentary, whether you’re offering tips, telling viewers about a mistake someone made in the original video, or sharing why you liked the content.
Make sure you have a high-quality webcam and microphone, so viewers understand what you’re saying and feel more connected with you. You should hone your editing skills to keep viewers’ interest with transitions and effects, too.
Related Articles:
- Publishing and Promoting on YouTube
- Editing Videos for YouTube
- Shooting Videos for YouTube
- Pre-Production for YouTube
Was this article helpful?
You May Also Like:

Recommended Products:


