Creating a Textured Look Using the Blender in PhotoDirector Mobile
The Blender tool lets you apply more sophisticated overlays in PhotoDirector Mobile. With Blender you can easily control blending details when using your own images as overlays.
In this tutorial, we will demonstrate overlaying a texture in the background without affecting the portrait in the foreground. The texture has a warm color which will also give a warm soft hue to the overall image.

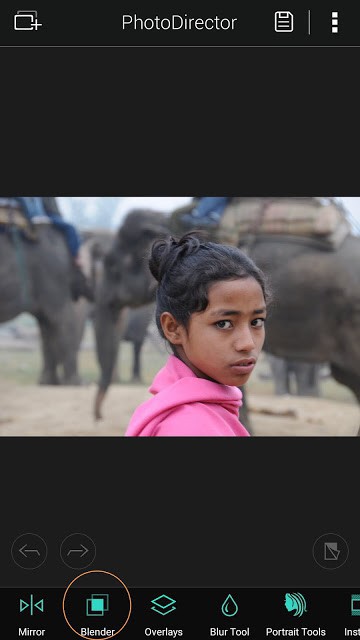
First capture an image or select a photo from your library and click on the Blender icon.

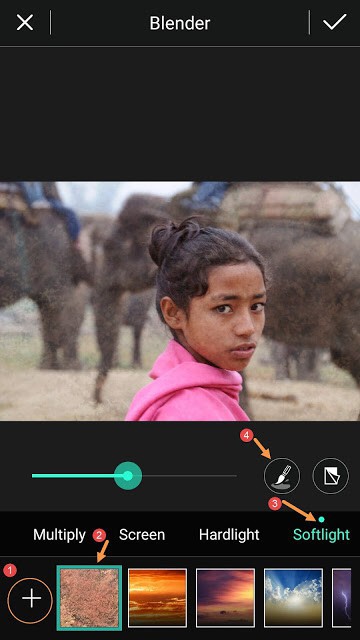
Next, click on the "+" icon to select a texture image of your own. Then choose "Softlight". Notice how the texture image covers the entire photo - you can leave it that way. But for this image, we would like the texture removed from the girl's face and body, so the portrait stands out more. The "Brush" icon gives us the ability to further fine tune the image.

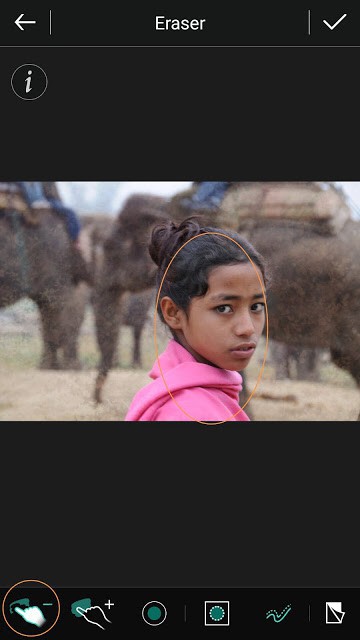
Select the "-" icon to remove the texture from the face and body of the girl. If you accidentally remove the texture in the background, you can always use the "+" brush to put it back.
There is a convenient Before/After icon to check your progress. Simply press and hold to view the original image. Once you are done, click on the Check button on the upper right corner.

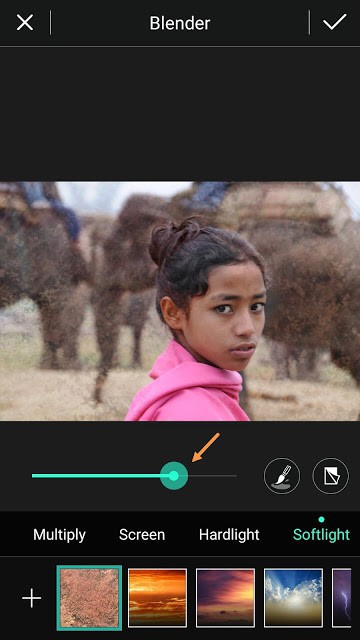
Now that you are back to the Blender tool main interface, scroll the slider to select the intensity of the textured look. Go from a subtle to an intense look, it all depends on your personal taste and preference.
And here is the image Before and After:


