How to Import and Organize photos
You can import photos into PhotoDirector from your computer's hard drive, a digital camera, and from removable devices, such as memory cards and portable hard drives.
Import and Add Tags to Manage Photos
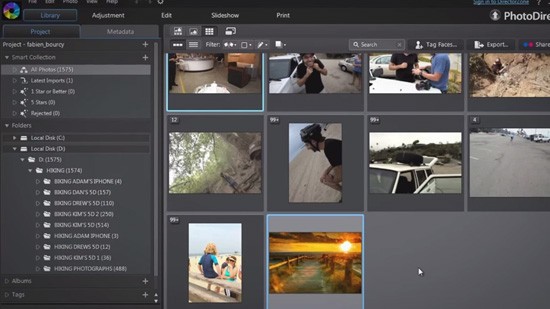
1. To import photos, go to the Library module, and then click on the Import button to Import your photos from your hard drive or SD card.

2. Select Photos to import your individual photo file.

3. Select all of the photos that you want to import, and then click Open.

4. Select Folder to import a folder of your photos.


5. You can also organize your photos by adding keyword tags after you have imported all of them. Go to the Photo Import window, click the Advanced button and select the Apply During Import dropdown menu.

6. Type any keywords or numbers to tag you your photos, separate with a semi-colon. Use " > " between them if you want to create hierarchical tags.

7. Click Import to Import all the photos into your library.

Photo Management with AI Facial Recognition
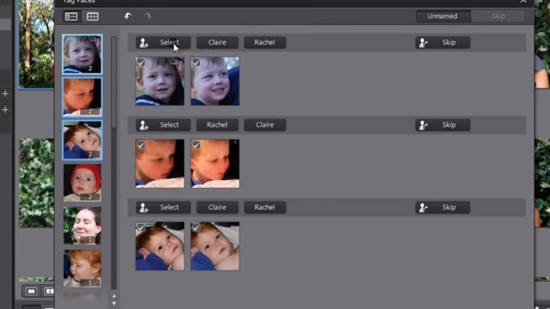
After importing your photos, you can easily add face tags to organize photos. Select your photos and click to operate Auto Detect Face in Selected Photos.

You can assign names to each faces and click Done when finished.

Click the Face dropdown menu to view all present face tags.

Flag tagging
Another way of tagging photo is flag tagging. This help to sort the photos we may want to use later.
1.When in thumbnail view, select a photo and then click to flag a photo that you like and may want to use later.

In contrast, click to reject a photo you do not like or want to use.

2.click  and then select an option in the list to filter the photos in the panel by their flagged or rejected status. If we filter by flag, the selected photos are displayed.


PhotoDirector 2025 Essential
Free Software With 30-Day Premium Features


