How to Use Photo Masking to Improve Your Photos
There are a number of ways to replace overcast skies. Whichever method you use, keep in mind that choosing the right sky to composite into your image is the key to making your final photo realistic. Watch for the colors and atmosphere, don't match overcast shots with sunny bright skies, and if the direction of the light is inconsistent, the composite will look odd.
In this tutorial, we have chosen an image of the Flatiron building taken against an overcast sky. The original image is bright, which makes it ideal to have blue sky behind it. These are the 2 images we will blend together:

|

|
First import the Flatiron building image and go to the Layers module in PhotoDirector. The Flatiron building image is the background image.
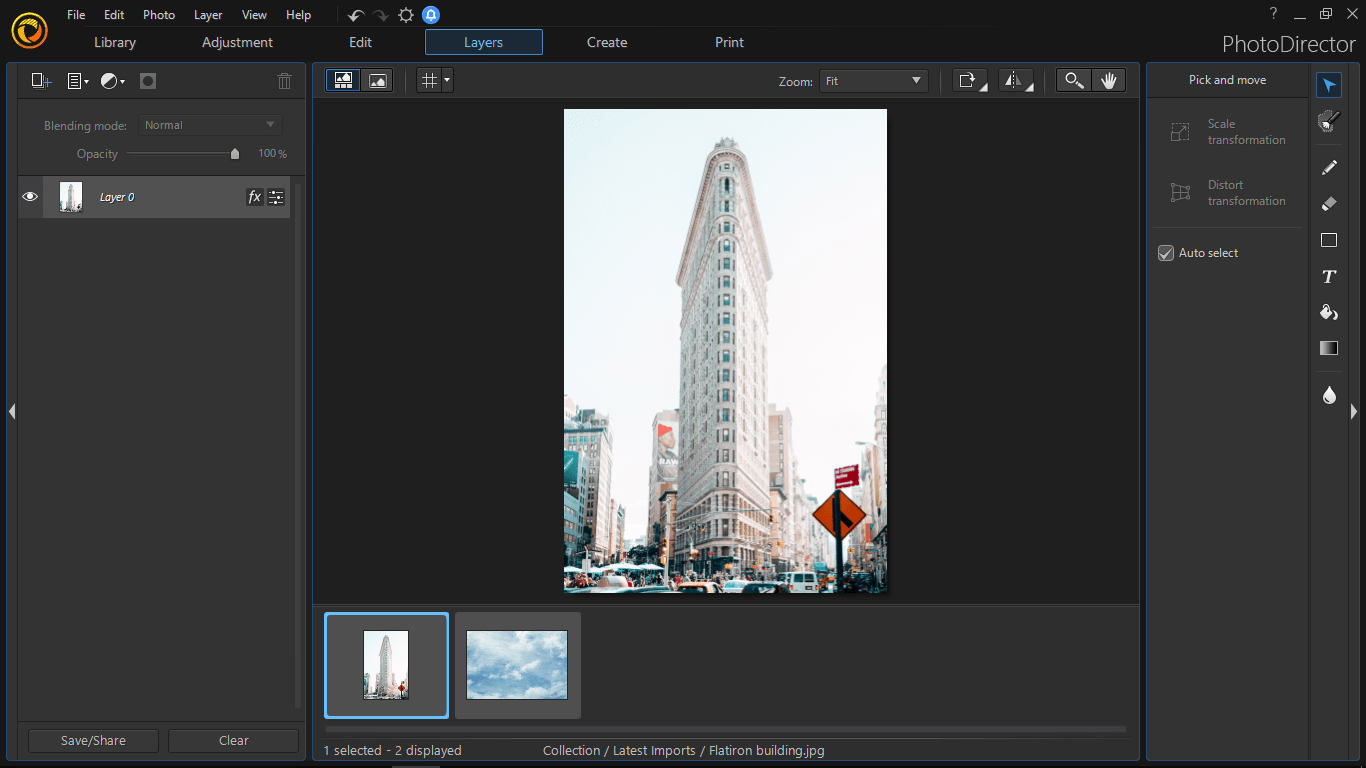
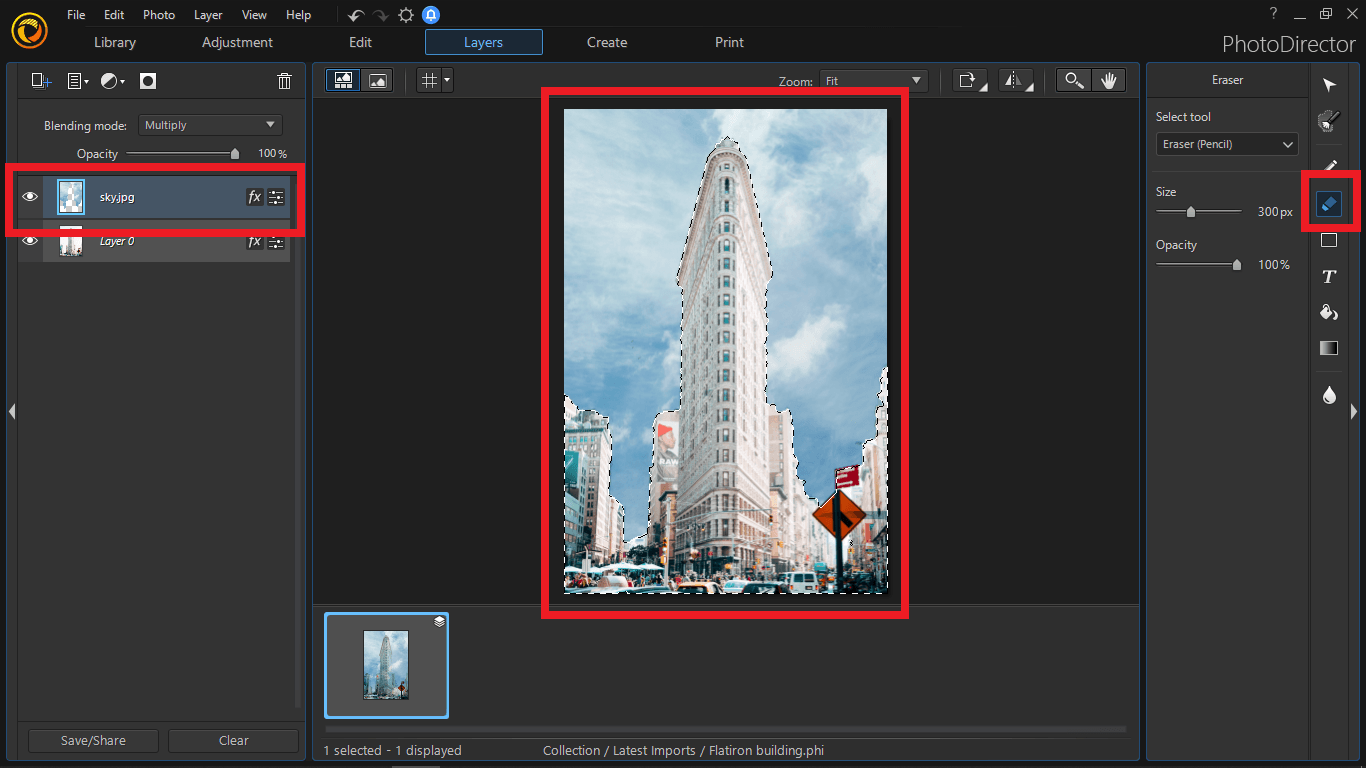
Next, import the blue sky image to the Layers module and it will be on top of the background image. While the image of the sky is selected, change the Blending Mode to Multiply.
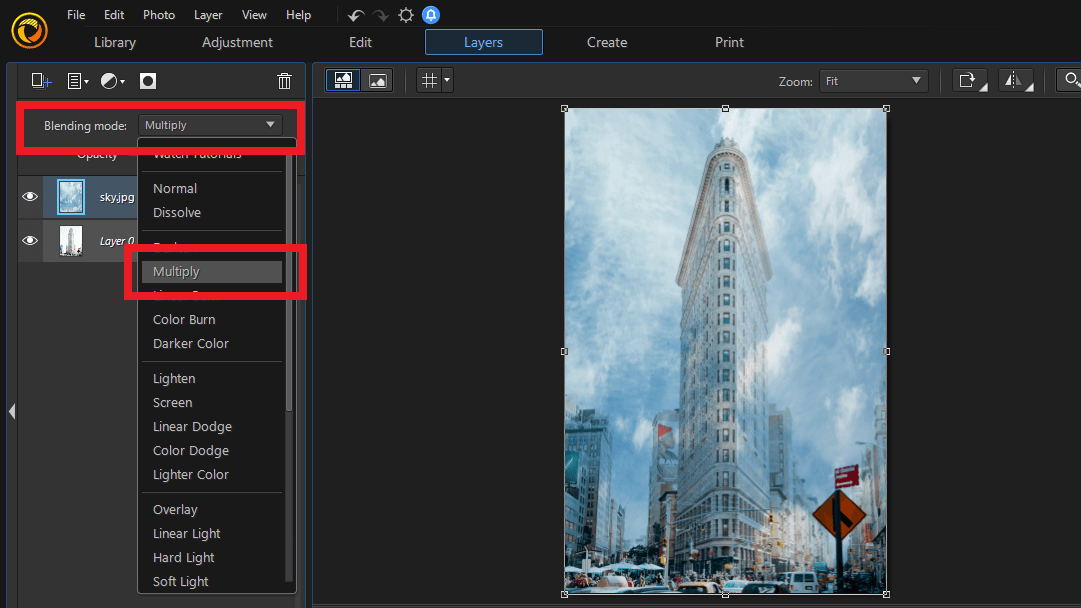
The blended image will make the darker areas of the background image visible.
Next, use the Move tool to position the image of the sky, it may take several trials until you get a perfect placement. Zooming out will make it easier to move and drag the corners of the image.
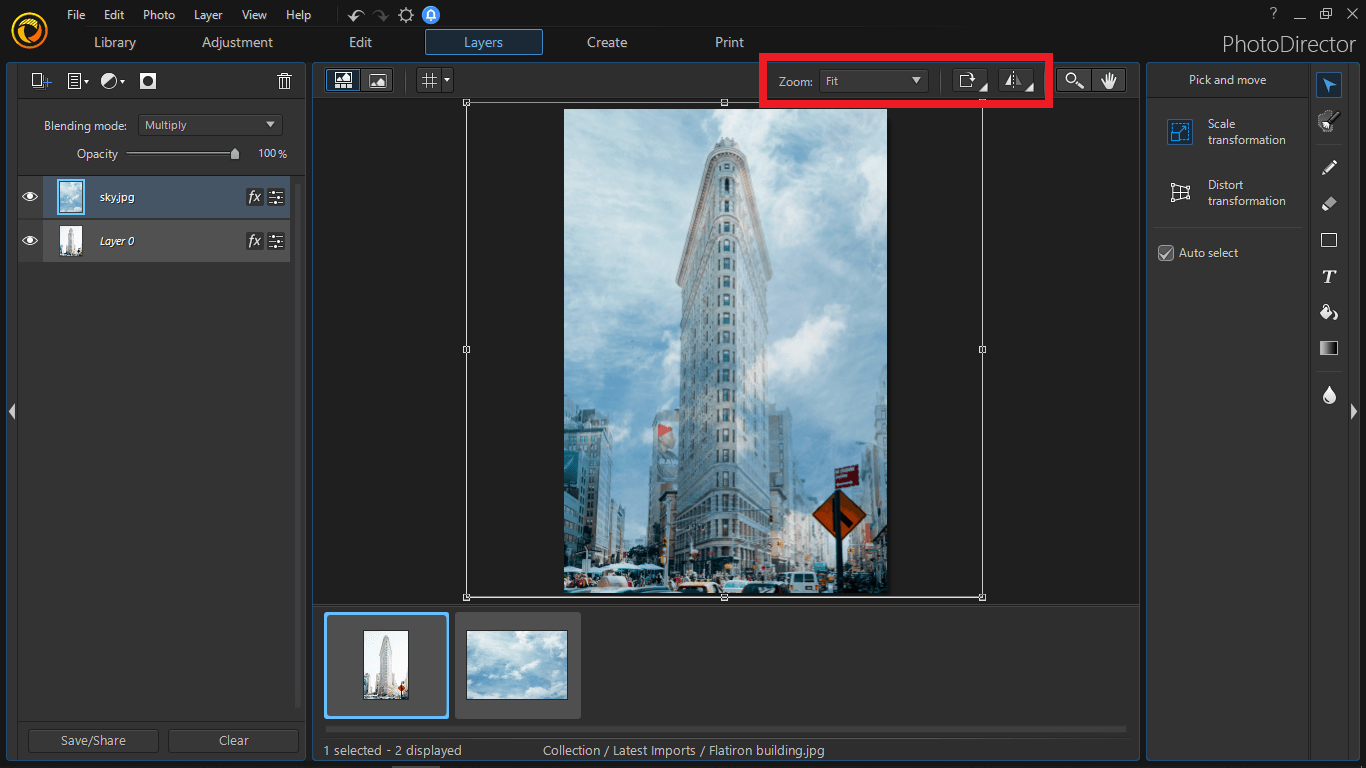
Now, there are a couple of problems to fix. The image of the sky is bleeding into the building.
These can be easily fixed with the Eraser tool. To ensure we can erase the area specifically, select the building’s layer first and click on the Select area tool to select the area of all the buildings.
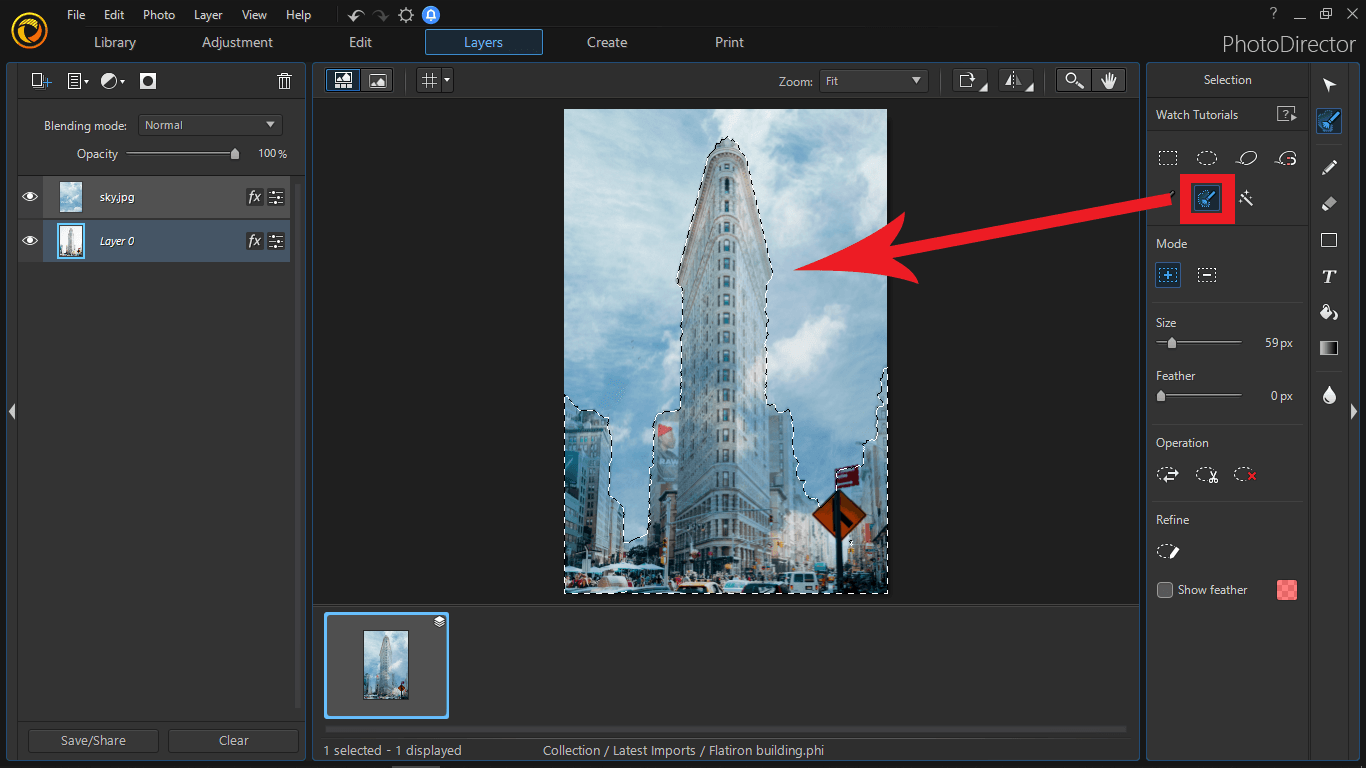
Next, click on the blue sky layer and use the Eraser tool to erase the area we have selected.
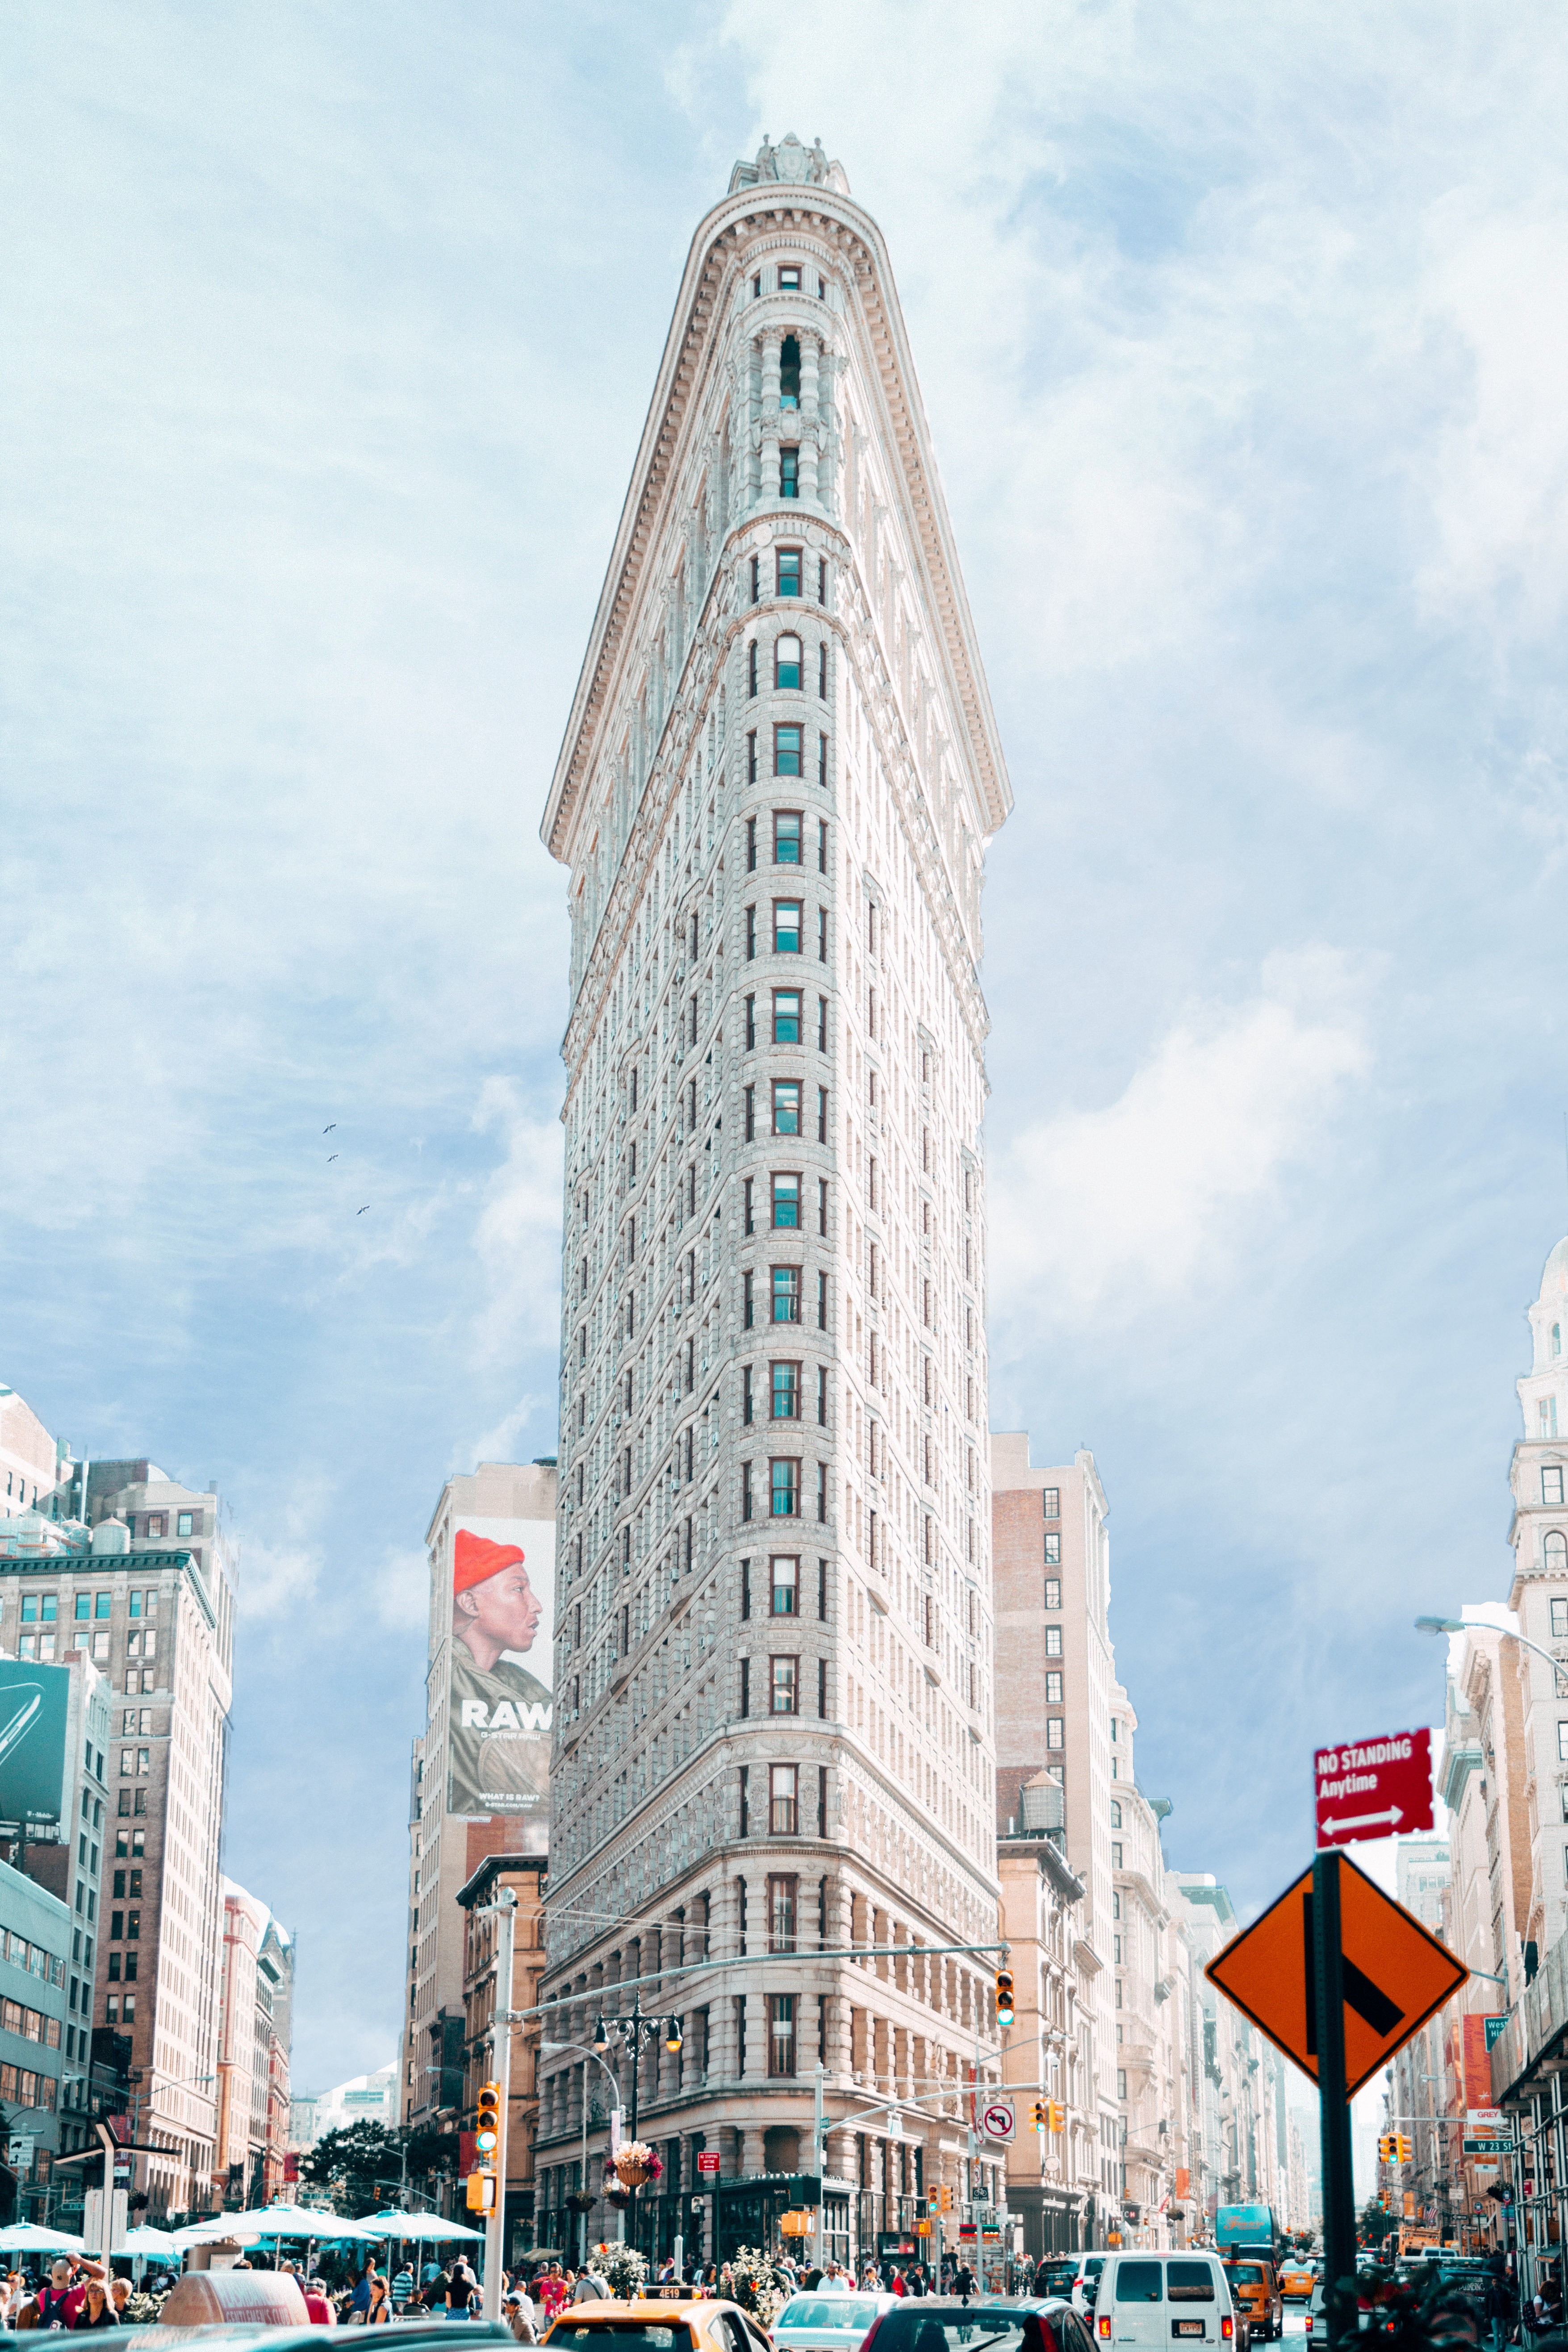
And the final image:
 Download a Free 30-day PhotoDirector Trial
PhotoDirector 2026 Essential
Free Software With 30-Day Premium Features


