Introduction to Layer Editing| PhotoDirector Photo Editing Tutorial
The Layers module is a powerful tool that allows you to perform special editing and compositing effects with your images. With the ability to save your project files so you can also make further adjustments easily and edit later. First, let's get a basic understanding of what a layer is.
A layer is an image stacked on top of another. Each stacked image acts like a transparent piece of tracing paper placed over your main picture. This means your layers can be edited, adjusted and repositioned without affecting the other images. Consider the picture below. It looks like one flat image, but in fact it is comprised of 4 main image layers.
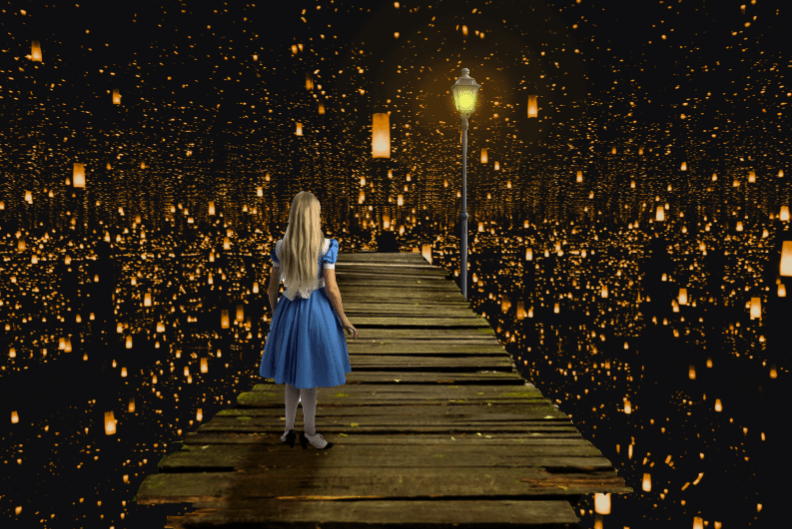
Below is a tutorial that shows how this image was made.
Select a background image, which in this example is the photo of the space full of light, then click on the Layers Module.
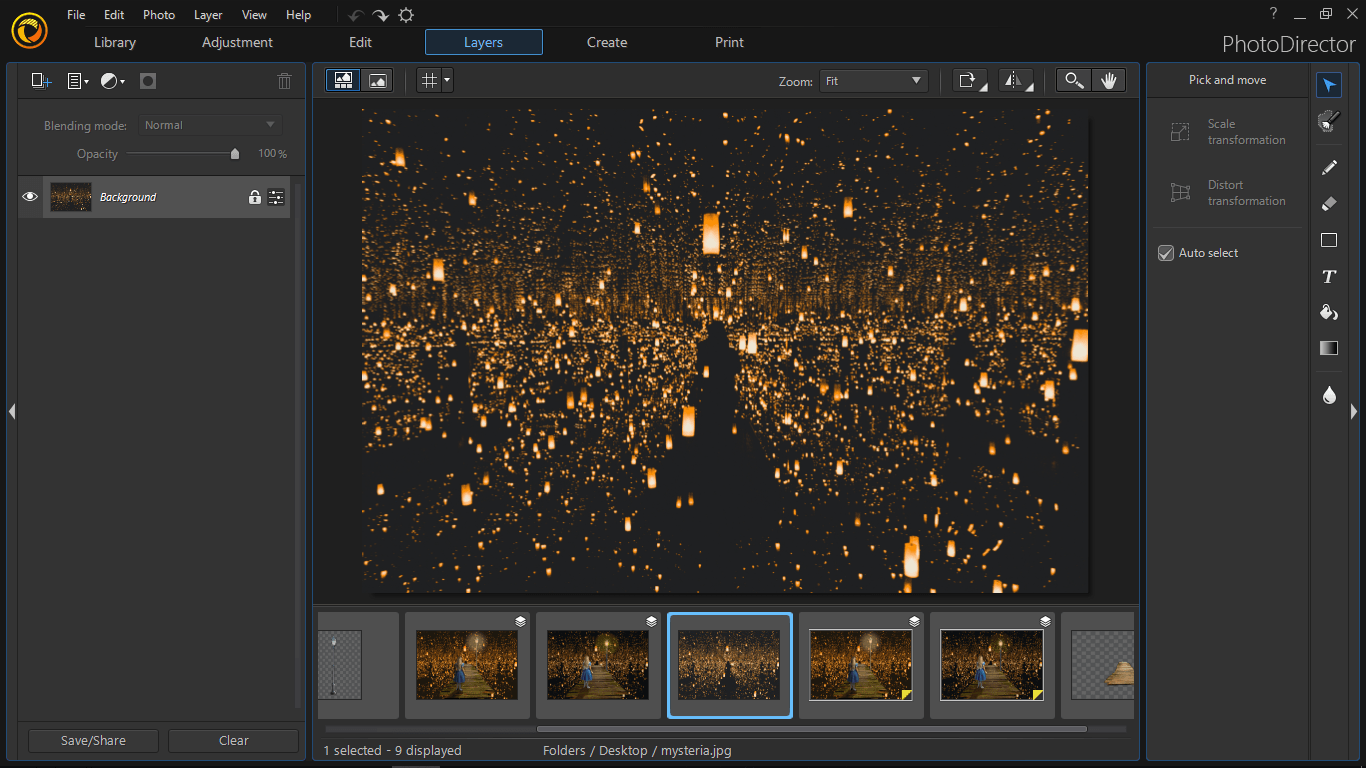
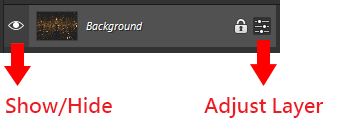
The first image you selected will be the default background layer. The background layer cannot be deleted. For your layers, click show/hide and make color adjustments by clicking the Adjust Layer icon.
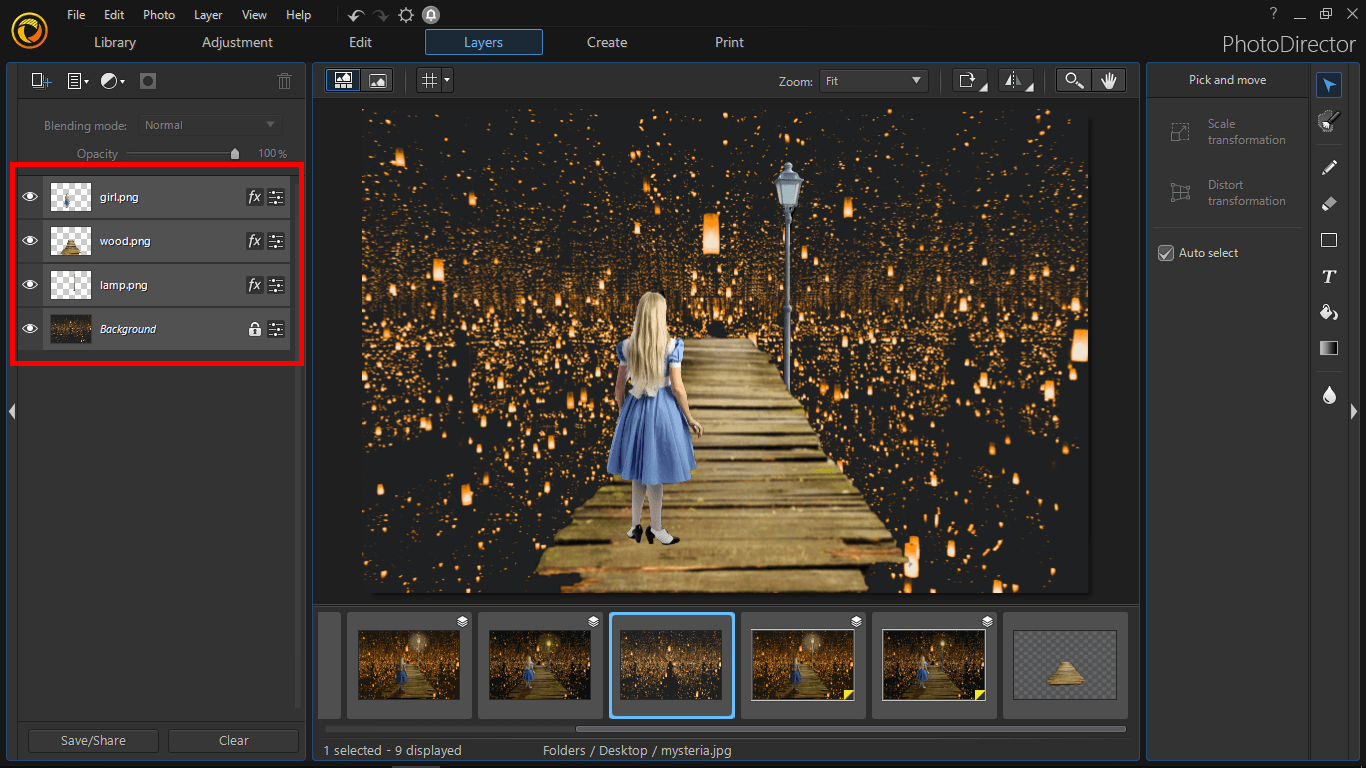
Next, import the image of a girl, a wooden bridge and a street lamp by dragging them from the library.
These images are in a PNG file format, meaning that the background is removed and transparent. So, we can simply reposition and resize them on top of the background image.
Using Adjustment Layers
Adjustment Layer is a process of non-destructive editing. Theses layers don’t contain any apparent content. They alter the image below, but you can always turn them off or modify them, so your original image stays untouched. Rather than edit image pixels directly, you can edit an adjustment layer and leave the underlying pixels unchanged.
First, because the wooden bridge is too bright, so we will add a Brightness/Contrast adjustment layer by clicking on the Add adjustment layer > Brightness/Contrast.
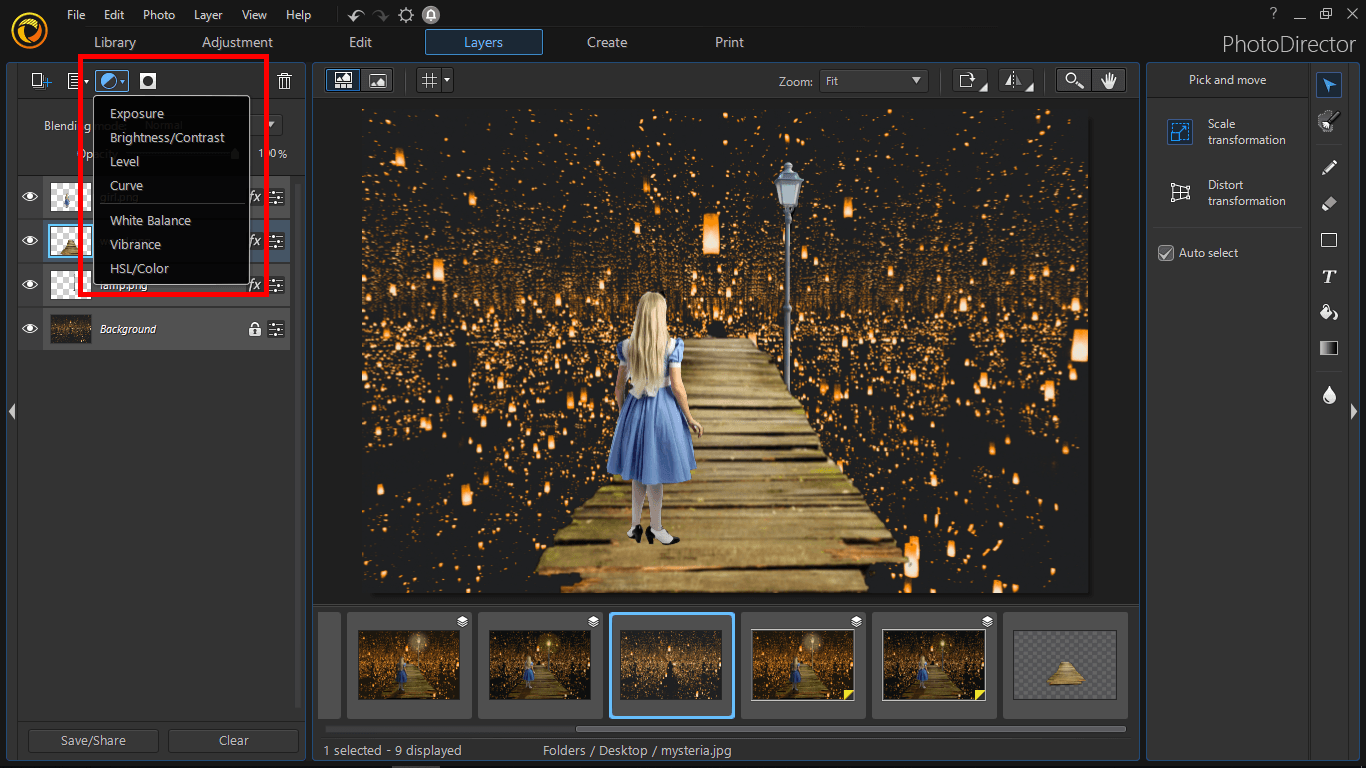
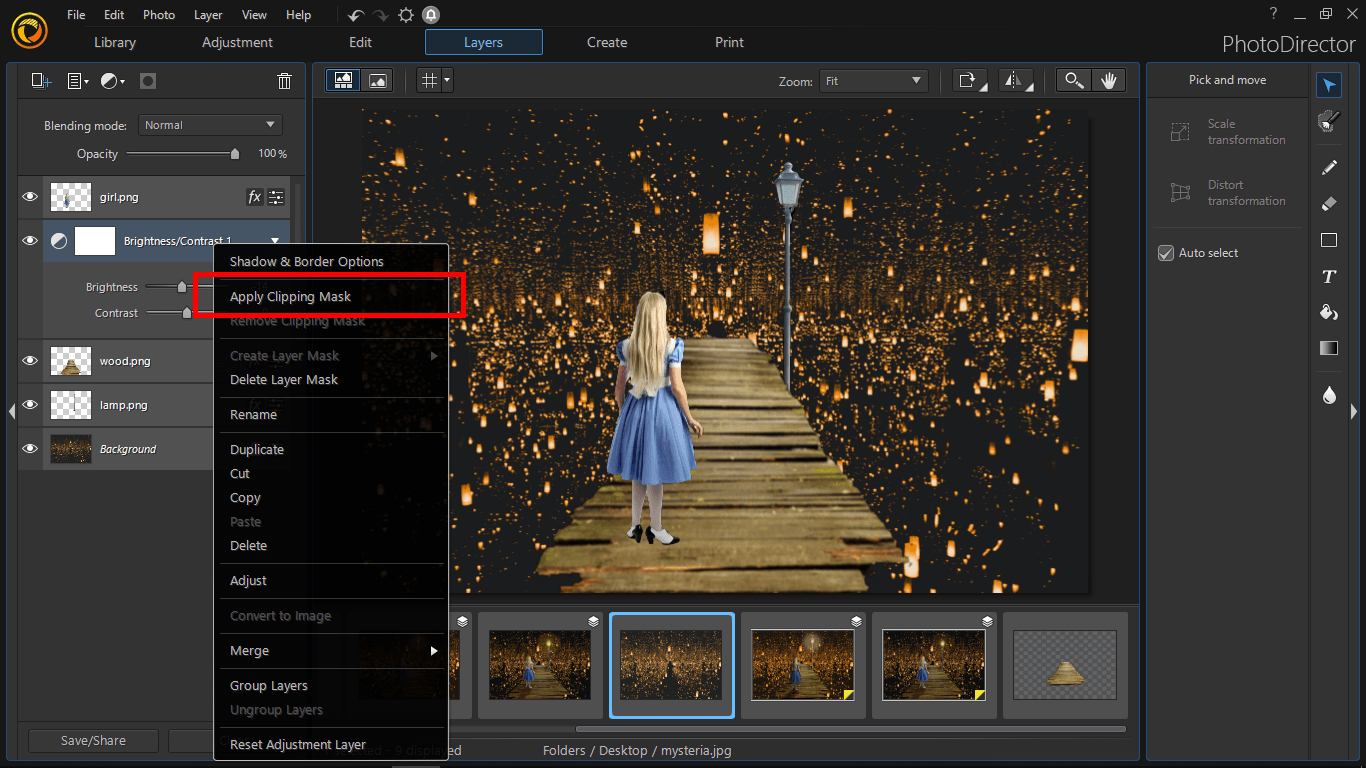
After adding a Brightness/Contrast adjustment layer, you can also right click on it and Apply clicking mask so the adjustment layer will only affect the next layer.
Using Group Layers to Organize Your Layers
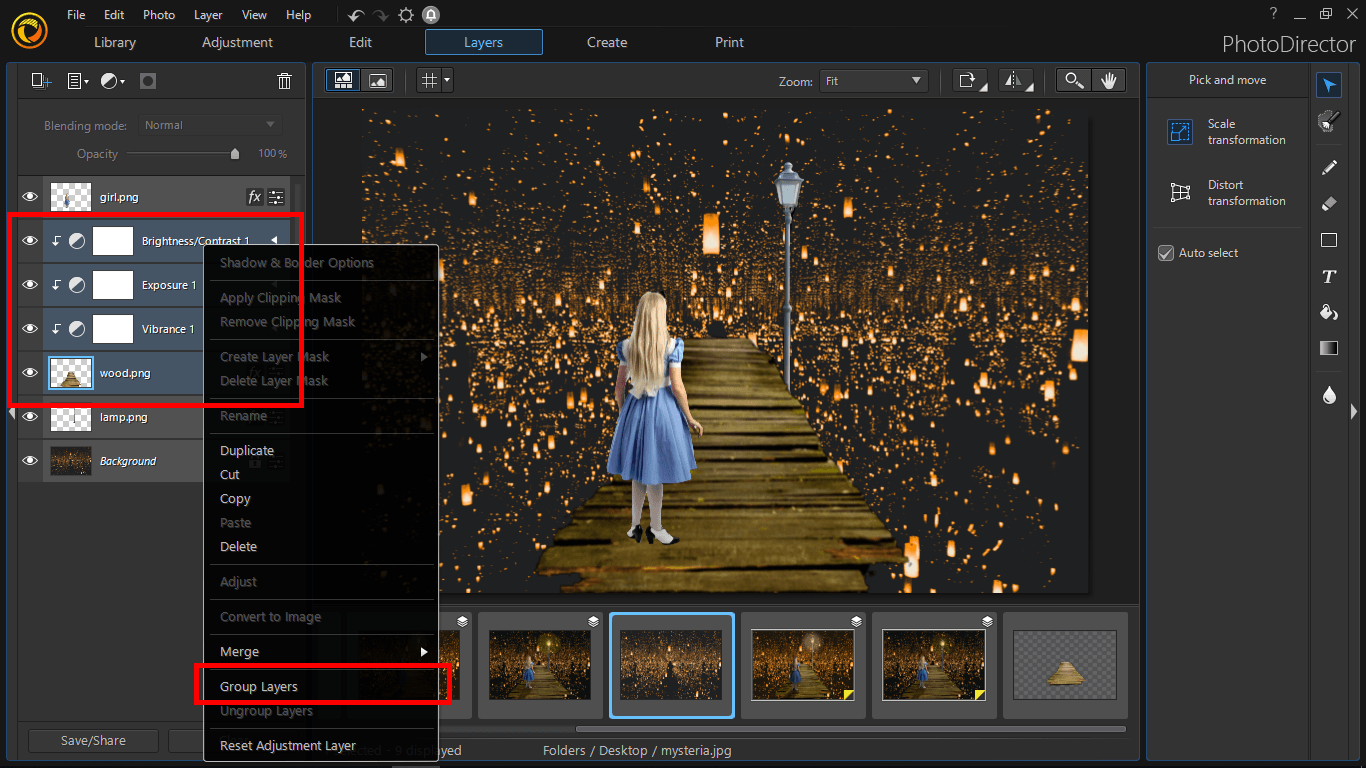
Grouping layers helps organize your projects and make the working area more clear. By linking layers, you establish a relationship between them, even if they aren't next to each other in your layer order. Once the layers are select into a group, you can move or adjust them simultaneously.
To group layers, select multiple layers and right click > select Group Layers.
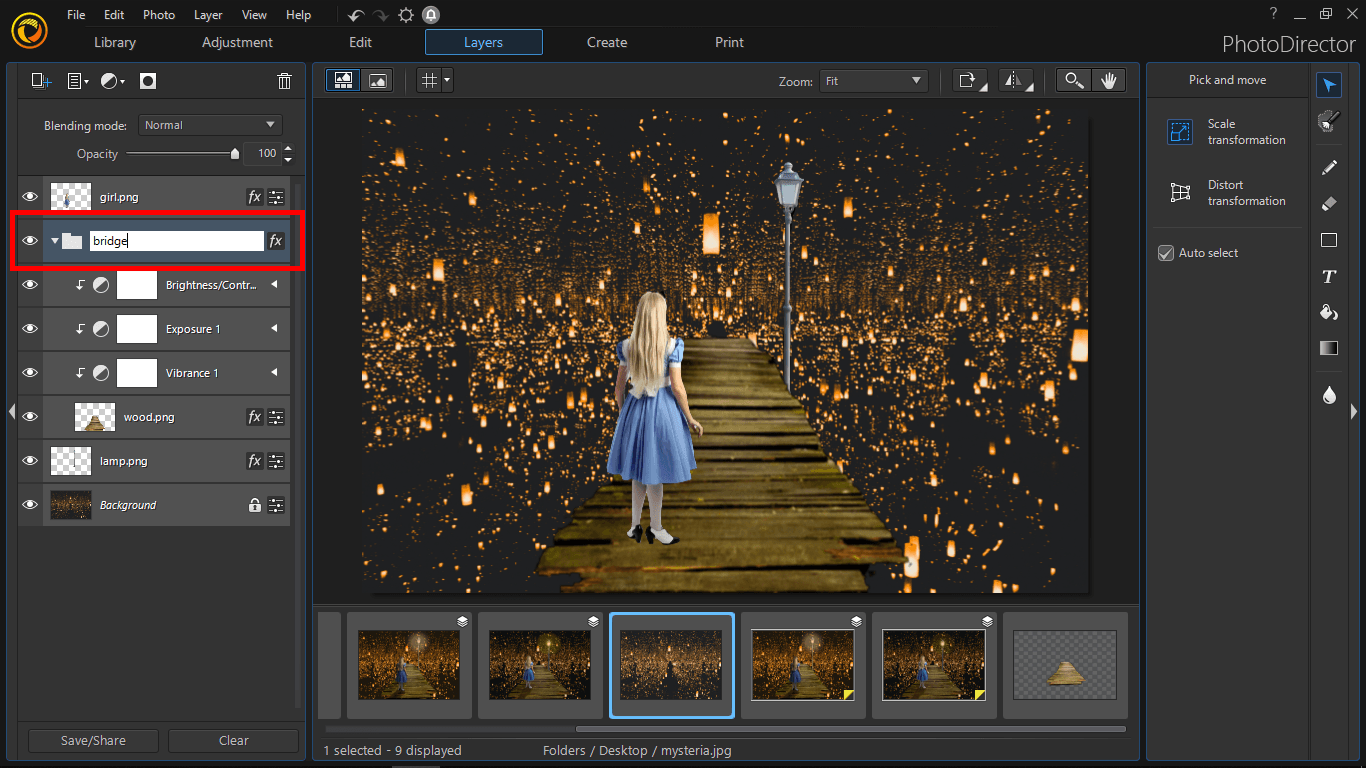
By double clicking on the group layer, you can enter a new name for the group layer.
Adding an Empty Layer to Create a Painting Effect
An empty layer is a transparent layer which you can paint on it. To add an empty layer, click on the Add new layer button and select Add Empty Layer. We will use this empty layer to create a light effect for the street lamp.
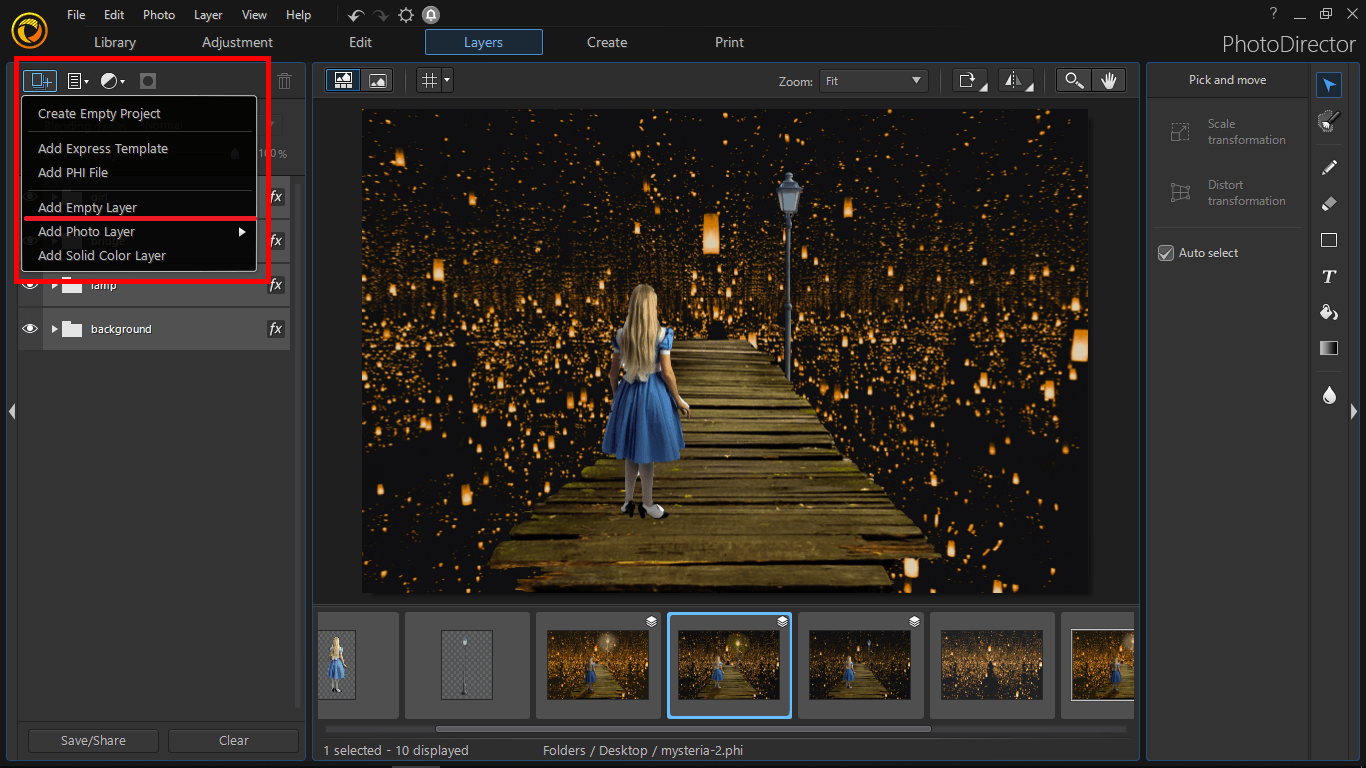
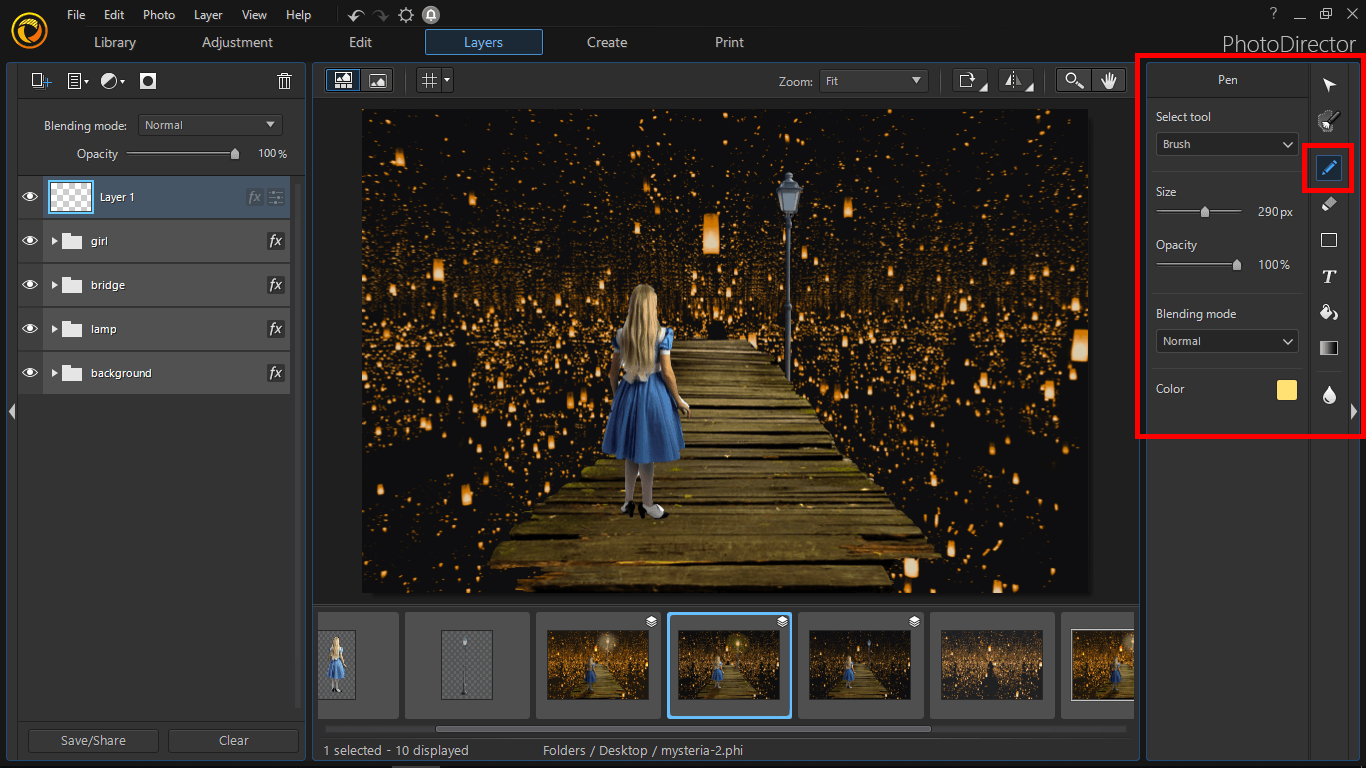
Select the brush tool and draw a yellow dot on the street lamp. Change the blending mode to Linear Light to make the light effect looks more nature and brighter. You can also change the opacity of the blending mode to make it more transparent.
When you finished editing, you can save your project as a PHI file by clicking File > Save as a PhotoDirector Layer File. This is a PhotoDirector format which saves all the editing information and it’s very useful if you need to edit again in the future.
The PHI format will also automatically imported into your library.
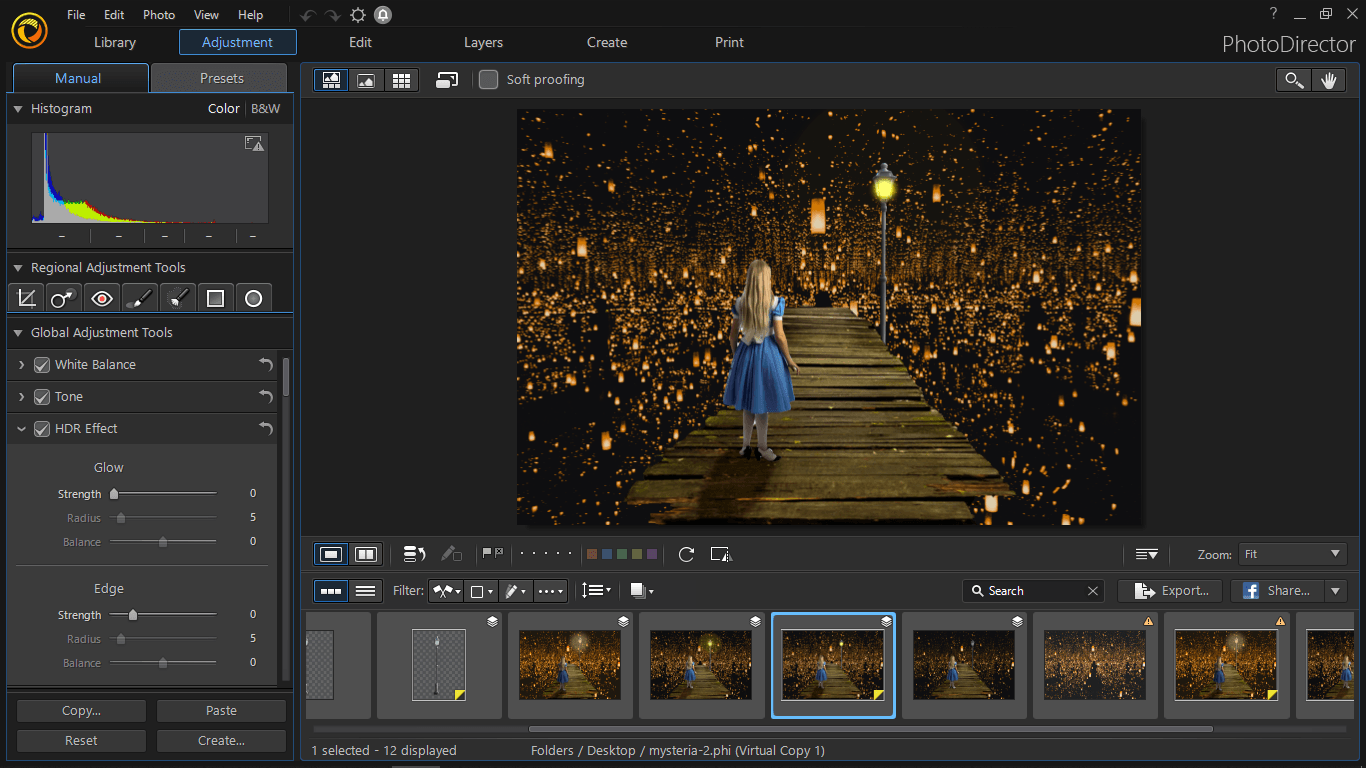
Here is the final result:
 Download a Free 30-day PhotoDirector Trial
PhotoDirector 2026 Essential
Free Software With 30-Day Premium Features


