How to Create Your YouTube Home Studio
- How to Create a YouTube Studio At Home
- Where to set up your home studio
- Setting Up Your YouTube Home Studio
- YouTube Setup Equipment: Production Gear
- Conclusion
1. How to Create a YouTube Studio At Home
Why Build a Studio?
Think of your favorite TV show. Do you remember what it looks like? Some of the rooms or sets where the action occurred? It sticks with you, doesn’t it? Whether you notice it at the time or not, one of the most impactful elements of quality video content is the set or its scene.
It may just seem like a background to the action but it’s doing a lot more than you may think. From the style and dressing of a set to establish its mood, to how it’s built technically to allow for light and sound, a set is a greatly undervalued component of great video creation not to be overlooked by any aspiring YouTube creator.
Who Needs a Studio?
Whether you’re just getting started creating content for YouTube or looking to take your content to the next level, considering where you’re filming can have a huge impact on the quality of your work.
Your studio is not just the backdrop to your videos, it is your creative dojo. How you set it up can not only enhance the quality of your production visually, but it can transform your creative mindset entirely. A good studio will both make filming easier and inspire you to do it.
We recommend that anyone who is serious about creating videos for YouTube create a workspace studio to plan their content, film, and edit it. With the right setting, your drive to create and the visual quality you produce will grow and put you on the fast track towards more views and subscribers.
What Will Your Studio Look Like?
Your Studio is a Character in Your Story

When you tune in to your favorite shows, an essential component is where it takes place. Sometimes it’s a bedroom, kitchen, or stage… no matter what it is, you must consider your setting’s role in your video. Whether you intend it or not, the audience is going to develop a relationship with where your videos are set, just as they would with the characters in it.
So with this in mind, what kind of impression do you want to give? If your set is a character in your story, what will that character be like? Will it be clean and staged for a professional presentation or casual for intimate storytelling?
These are important questions to ask yourself when considering building your studio. Your YouTube studio will be a character in your story and should reflect the content you are making. What it looks like will be an extension of your video content, its quality, and your overall brand!
Define Your Style and Be Consistent!
When viewers are flipping through the channels, how are they going to know they’ve found YOU? Just like you might get dressed up to go to a party hoping to catch the eye of your crush, your video set needs to stand out too!
Creating a unique set helps you establish your brand and helps set you apart from the crowd of millions of YouTube creators. One of the great parts of having a studio means that you can set it up exactly how you want it to look, and always shoot in the same, finely crafted conditions. Not only will the scene be exactly how you want it, the light, sound, and camera can remain the same, too making setting up easy and your visual aesthetic consistent. Being consistent is important! It helps your viewers build a relationship with you and your videos, no matter which video they’re viewing.
When designing your studio, think backdrop, props, color, lighting (we’ll get more into this later), decorations (or none!). Literally everything on camera matters so consider each component wisely. But whatever you create, it should be an expression of you and your channel’s brand.
Food for thought: There are hundreds of millions of videos on YouTube. How do you stand out? Create something uniquely you in your set that people will remember and carry it through all of your videos.
Complement Your Subject Matter
Imagine a tech channel reviewing computers in a kitchen, with pots and pans in the background. It doesn't make sense. Having a mismatched set can be a huge distraction and turn off viewers. Thus, you should plan a setup according to your content.
For instance, you can choose a stylish studio for your fashion channel, a plain, non-distracting background for education content, a decorative ensemble for fun crafts, or props for a prank or a comedy channel.
Hana Hart has a mess behind her... but it works. Why? Because she is making personal videos and it is an authentic window into her life!
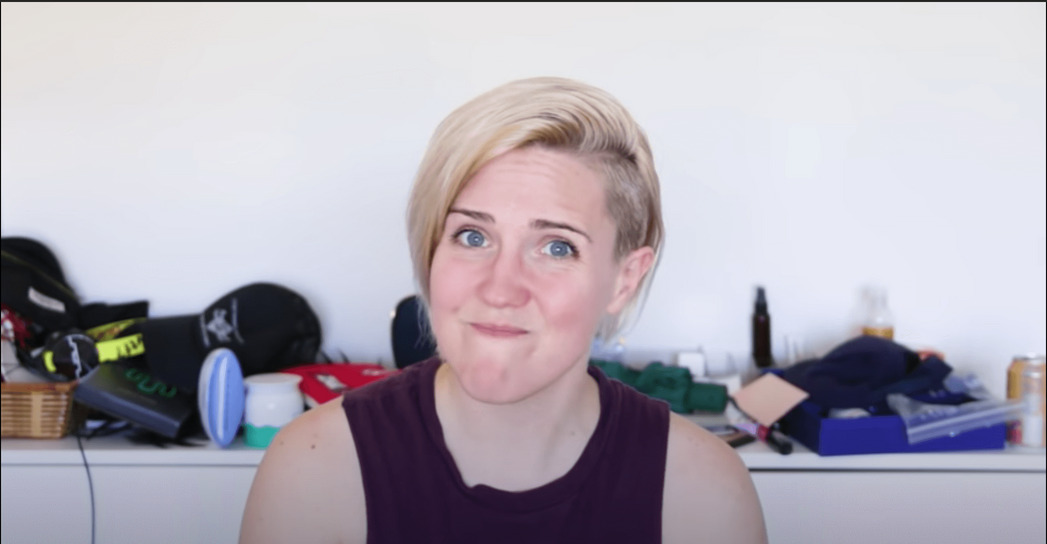
How well you keep your arrangements together, will affect how your YouTube channel establishes a brand and connects to your audience. In most instances, some quirky things in your studio will grab people’s attention. Consider making parts of your set hallmarks of your style… and maybe even include it in your Video Thumbnail so people can identify you!
Food for thought: What kind of content are you creating and where is the ideal place to be when presenting it? Is it a kitchen? A workshop? A science lab? Create a set that matches your channel’s theme!
Technical Considerations for Your Studio
The right environment
The three most important conditions for capturing good video are lighting, sound, and location; no matter what equipment you’re using, all these things affect the quality of a video far more than anything else.
If you're already good at creating unique video content, the quality of the image or audio can easily spoil it. Setting up your studio properly can ensure you’re always ready to capture the best quality video and sound, consistently, every time you shoot.
2. Where to set up your home studio
When it comes to setting up a home studio, there are a lot of conditions to consider for your video and sound recording. First, what space do you have available? You’d be amazed at what you can set up in a small space, so don’t feel limited if you don’t have an entire room to commit to your studio, even if you’re planning on doing all of your filming there!
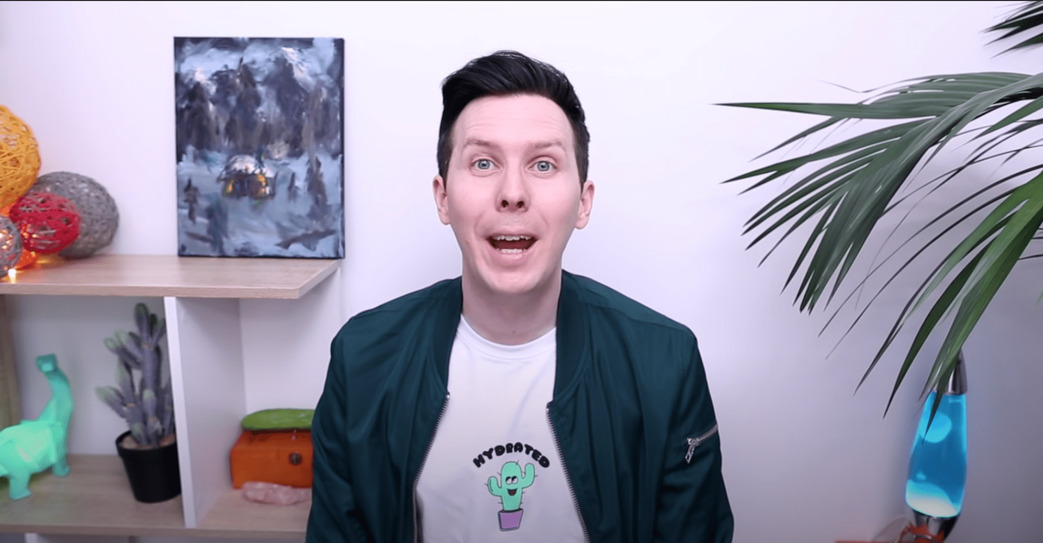
AmazingPhil, a creator with more than 4 million subscribers, shoots against a wall in a small space.
In reality you can work with just about any amount of space, but you’ll also need to consider the shooting conditions as well. What kind of light are you working with? What does it sound like in the room when you talk? Does it have enough room for all of your equipment and space to work in front of the camera? Picking the right spot with the right conditions is the most important thing to consider when setting up your YouTube studio so let’s go through these key considerations when picking your space!
Picking the right spot with the right conditions is the most important thing to consider when setting up your YouTube studio so let’s go through these key considerations when picking your space!
Location
Location, location, location! Your YouTube studio must consider the following:
- Size: It must be big enough for you and your gear... BUT bigger isn’t always better. Large spaces are a nightmare for recording sound and look empty if it's not full of stuff! You must be like Goldilocks when choosing your space. Big enough for your production and small enough to fill the frame and reduce echo!
- Noise: Is it loud around your space? Traffic? Construction? Annoying family members? You’ll be surprised by how much background noise can be picked up by microphones. Don’t spoil a good recording session by disruptive noise! Find a quiet spot.
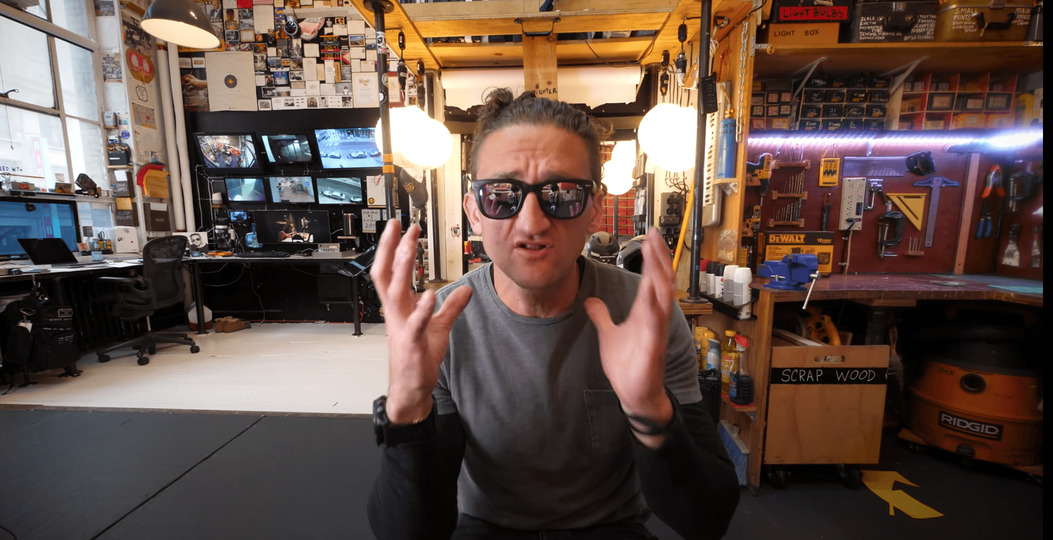
- Style: If your YouTube channel falls into the lifestyle category, consider your location first. You probably want to show your subscribers and audience how you live and what you do in your videos. Make sure the site is representative of what you do and try to find unique elements from it to engage with content.
- Light: Will you be relying on natural light or room light or will you be setting up special lights for your videos? If you’ve got great natural light, awesome! Set up your scene with the light falling on your scene, in front (not behind) your subject, and make sure you have plenty of it! If you don’t have ample natural light, you’ll want a space with no light at all and you’ll want to set up studio lights. Don’t worry, we’ll get into this more next!
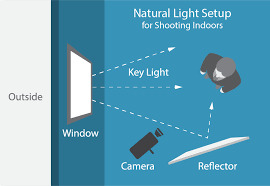
Using Lights in Your Home Studio
Like we mentioned before if you don’t have great natural light, no worries – using lights will give you more control. With studio lights, you can craft the perfect look and get the same results each time you shoot.
When setting up your studio lights, you’ll want to consider these fundamental elements. Here’s a quick brief on what to look for (don’t worry, we get into the gear further down!):
- Light Control: This means having control over all of the sources of light in your studio. Can you brighten or dim it? Can you change the color? Can you move where the light is coming from and where it’s landing? If not, it’s not under control!
A general rule of thumb is to remove any light that you can’t control. This might mean blacking out windows or turning off overhead lights to let your studio lights take control. - Light Direction: What direction the light is coming from and what it is landing on? You want your light to land on your subject in relation to where the camera is. That means if your camera is pointing at your face, you also want the light to land on your face, not the back of your head where the camera can’t see it!
There are a lot of fun ways to create dramatic effects with light direction, but as a general rule of thumb, you want most of your light to fall on the camera-facing side of your subject. - Light Temperature: This is also considered the color of light. Did you know that the light that comes from your lightbulbs and the light that comes from the sun are different? The camera sure does and if you are mixing light sources with different temperatures, the color of your video will be very unnatural and very difficult to fix.
The general rule of thumb is to use the same type of light for all of your light sources. Don’t try to mix natural sunlight and light from a lamp! - Intensity: Also known as brightness, but you knew that, right? What you might not know is that too much light can blow out details in your image, and not enough light intensity could mean details are lost in the shadows. Having the right balance of light intensity is key to having crisp, detailed video quality in your studio.
The general rule of thumb is to use soft or medium light on your subject so that it isn’t under direct, intense light. This will also help prevent harsh shadows. For most videos the goal should be to create a consistent, even lighting throughout the whole scene.
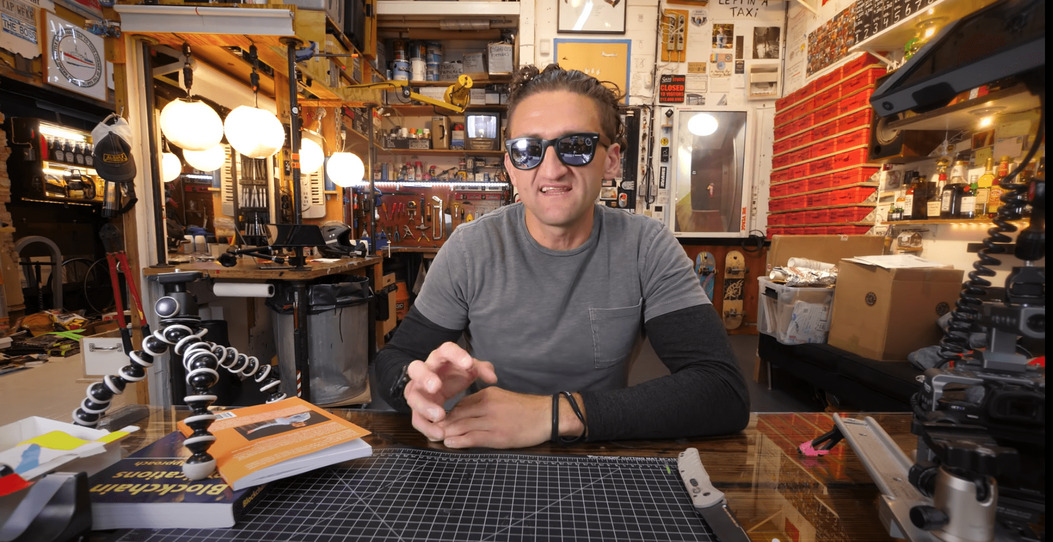
There are many ways to ensure a perfect light balance with both studio and natural lights but you’ll have to play with it to get your lighting perfect. Use window curtains, adjust shades, shoot at different times of day, and move lights around to find your perfect lighting setup.
You can even try to bounce or reflect light off of surfaces to help fill in unwanted shadows. The best part of having a studio is that once you’ve got your lighting set up perfectly, you can always shoot with the same results!
If you’re having trouble with your lighting, not to worry – you can always adjust your footage after you shoot with a great color grading software. Color grading software allows you to correct and stylize the color and lighting of your video when you edit and it’s a great way to enhance any footage, no matter the lighting!
Sound control
Imagine spending hours trying to get the perfect take only to hear the garbage truck roll through in the background or realizing when you get to edit that there’s echo in all of your voice recordings. It can ruin a shoot! One of the trickiest and often overlooked parts of making videos is sound quality. Where you record your audio has a huge impact on this and should be a serious consideration for your studio location and layout.
Whether you have a perfectly soundproofed studio or shooting in your kitchen, the key to a quality recording is controlling your environment and where you position your microphone.
Here are a few general guidelines to consider when setting up your studio for sound:
- Stay Close to Your Mic: Ever wonder why a lot of YouTubers and podcasters speak so closely to their microphones? It’s sound control. A lot of creators use microphones at low recording levels so no sounds come between their voice and the recording. This occurs because they are so close to the microphone and the sensitivity is turned down. This way it will only record what is spoken directly into the mic and not pick up background noise.
- Pick a Quiet Place: That’s all. Having a studio surrounded by noise is a no-go when it comes to sound recording!
- Manage Your Acoustics: We could write a whole other article about this one (maybe we will?) but simply put, watch out for spaces that echo. The bigger and more open the space, the more likely sound is to bounce back into your microphone and create an echo. For ideal acoustics, pick a smaller space with a low ceiling. If you’re just recording a voiceover, consider recording it in a closet that is full of clothes. Your clothes will actually help dampen the echo!
3. Setting Up Your YouTube Home Studio
Want to know how professional YouTubers set up their studio? These are some of the best ways to build your studio, whether you have a budget or not. If you're confident about your journey and you're willing to spend a few bucks more out of pocket, these things will make creating a polished product much easier.
Set Design - Where will you be on Camera?
This part is fun – building your set! A few things to consider when framing up your scene: Will you be at a desk or standing? What will be behind you? Will you be using props? From items you’ll be using and showing off in your video to purely decorative props for the background, now it’s time to consider everything that will be in your scene.
To make sure everything fits and looks good, it might be a good idea to make a plan on paper. You’ll want to figure out the best position for you to be on camera, where the camera will be placed as well as all of your other equipment. Don’t forget to consider all of the factors we have discussed thus far and where they will fit in. Lights, camera, sound, and background!
Backdrop / Green screen
What if you could go anywhere in your videos without leaving your studio? This is where your backdrops come in. Shooting in a bare room can quickly feel dull, and you can imagine how boring and irritating it will be for your audience who'll be watching it. Backdrops are the perfect solution to transforming your studio into your ideal location.
YouTube Gus Johnson created a simple backdrop for his videos with paper cutouts:
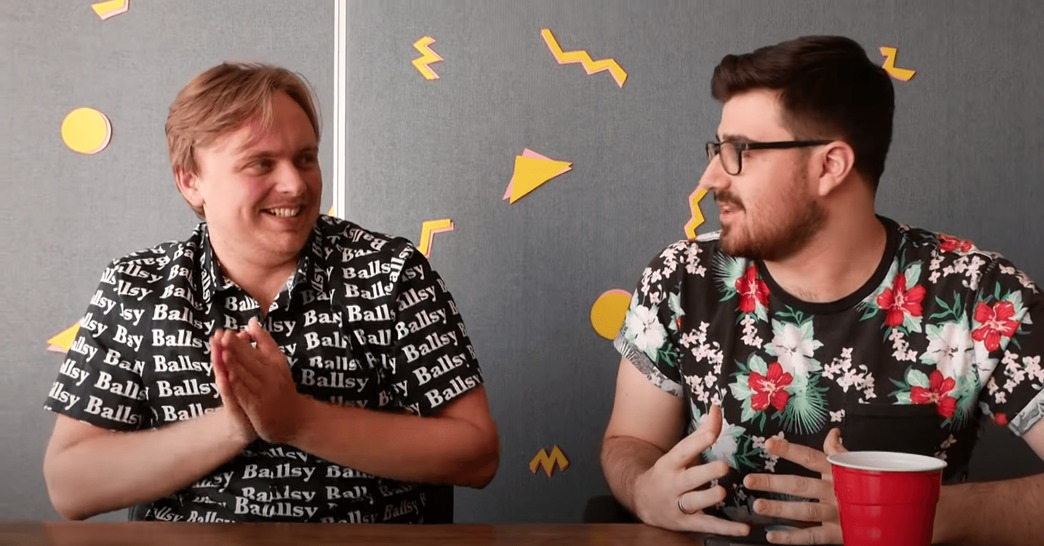
You can use virtually anything for a backdrop but some people like to hang posters, curtains, sheets, or even just finding a cool wall in their home. Many professionals use seamless paper or fabric to create a clean, consistent backdrop to hide any distracting areas.
Want to take it to the next level? Hang up a bright green sheet known as a green screen! With a green screen and some great editing software, you are able to remove the green background and replace it with any image or video you want!
Here’s an example of Dr. Disrespect, a popular gaming YouTuber using green screen to superimpose himself over his game:
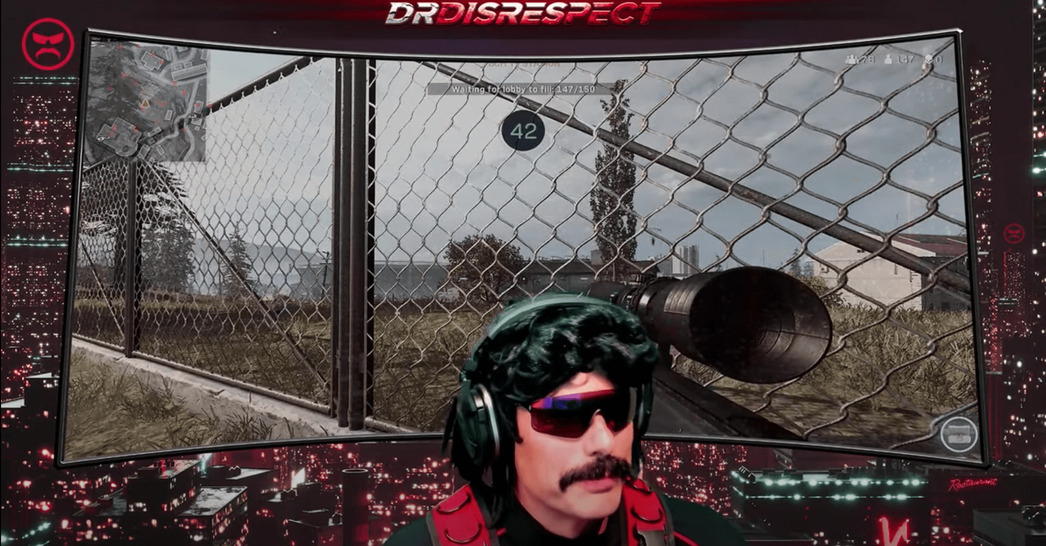
Green screen is especially useful for YouTubers who create gaming videos which allows them to superimpose video footage of them playing over the video of their gameplay! Before shooting with a green screen make sure to learn how to properly light it, as it will require some technical knowledge.
4. YouTube Setup Equipment: Production Gear
Now here’s a quick list of essential tools you’ll need for your studio. We won’t go into much depth with this article but you can use this as a checklist for your setup. For more detail, you can check out this article.
Camera
Ask any professional YouTuber; the main journey begins from a camera. Don't worry; there was an era when the professional shoot was only possible with the help of a 'special camera' that used to be very expensive.
Nowadays, almost everything is a camera! With the power of modern smartphones, you can capture high-quality video even with your iPhone or Android mobile phone. This is how many famous YouTubers got their start. Consider starting here before investing in more expensive cameras, because trust us– they get expensive!
Suppose you're ready for the next level and have the budget, then we’d recommend a DSLR camera. These are very popular with YouTubers because they allow you to use different lenses and provide extremely high video quality that looks amazing!
Tripod
A tripod is also an essential and overlooked tool for creating your YouTube Studio. When you’re on camera or just trying to capture a shot, you’ll want your camera to hold on your subject steadily and consistently. Nothing ruins a shot faster than shaky footage! No studio is complete without a good tripod.
Sound recording
Microphone
There are tons of different kinds of microphones you can use to record good audio. Although there are often built-in microphones on many of your devices, they might not be the best fit. They can produce and capture a lot of background noise. To capture great audio, we recommend getting a good mic. Some styles to check out are:
- Shotgun Mic: This is a great general mic. Good to capture audio from further away from the subject and multiple audio sources.
- Lavalier Mic: Great for a single person. Also great if you are moving around.
- Omni Directional Mic: This can pick up sounds from many directions and is good for capturing audio from a larger space.
Looking for the perfect microphone? Check out our article on the best microphones for YouTube!
Headphones
This one’s easy. You need to be able to hear what your recording… Even if you don’t your audience will! This is why we recommend over-ear headphones to give you the most detailed listening experience. You’ll want to hear every detail of your recordings before you publish it to YouTube!
Studio Lights / Lighting
Without lighting, you can't expect that level of excellence you often see in other professional YouTube Channels. Here are a few different kinds of lights used for YouTube videos.
- Natural Light- Natural light is always one of the first choices because it’s free. But just because it is free doesn’t mean it’s the best choice. If you use natural light you will only be able to shoot when the sun is out. You will also have to be aware the light can change throughout the day because of clouds and the path the sun follows.
- LED vs. Incandescent- It's one of the cheapest options outside of natural lighting; purchase online incandescent light bulbs, or use LED lights to fill your studio with light. A lot of LED light sets come with softboxes which create a soft light that evenly spreads across the space it is. These are a great option for beginners.
- Ring Light- A ring light is a specific kind of light in the shape of a circle. Its main purpose is to cast an even light onto a subject. These kinds of lights are great for vlogs and any video where the subject talks directly into the camera.
For more details on finding the best lights for your studio, check out our article on the best lights for YouTube!
Editing Suite
Here comes the last important segment of your YouTube studio, “the best editing suite," on which you'll be putting together all of the components of your top-notch content. For this, you’ll have to consider the following things:
Computer
PC or Mac anything will work, but make sure that you notice quality configurations. It must have decent RAM from 8GB to 32 GB if you seek a lag-free experience. Also, it should have an excellent graphic processor along with minimum 50GB free hard drive storage.
Software
The software you use provides leading-edge to your video content. You can add special effects and can include some attention-grabbing elements to push your content to the next level. It all depends on your creativity and choice of software.
If you're uncertain about what software to edit on, then try out PowerDirector 365. You can enjoy this award-winning video editing software for free. And if you genuinely like its features we recommend going with its premium version.
For a more detailed exploration of the best editors for YouTube, check out our comprehensive guide to video editors for YouTube as well as our list of Free editors for YouTube!
Hard drives
Videos can easily consume lots of data in your computer; thus, make sure that your Hard Drive consists of at least 256 GB of storage. Nowadays, SSD is most preferably used because it's deemed a faster option that brings swiftness in your task, but the end decision is up to you.
5. Conclusion
Wow, that was a lot. But don’t feel like you have to build your entire studio in one day. It takes time to build a perfect studio, even if you’re already a pro. Build a checklist for what would work best for your studio and go step by step. We bet with the right studio, you won’t only be making better videos for YouTube, you’ll have way more fun while you’re doing it.
Happy shooting!
If you liked reading this article, you may like reading our ultimate guide to becoming a YouTuber. Check out our blog section to view even more great articles


